Annotate 3D Models
DEAR project provides intuitive user interface for annotating 3D models, which is currently adding the correct labels to different parts of the 3D objects. In the future, we will deploy more annotation types beyond just part annotation.
Intro
What is Part Annotation?
Part annotation involves identifying and naming different parts of a 3D object, much like labeling the components of a complex machine or real world object. In 3D modeling, this could mean separating a character model into arms, legs, torso, and head.
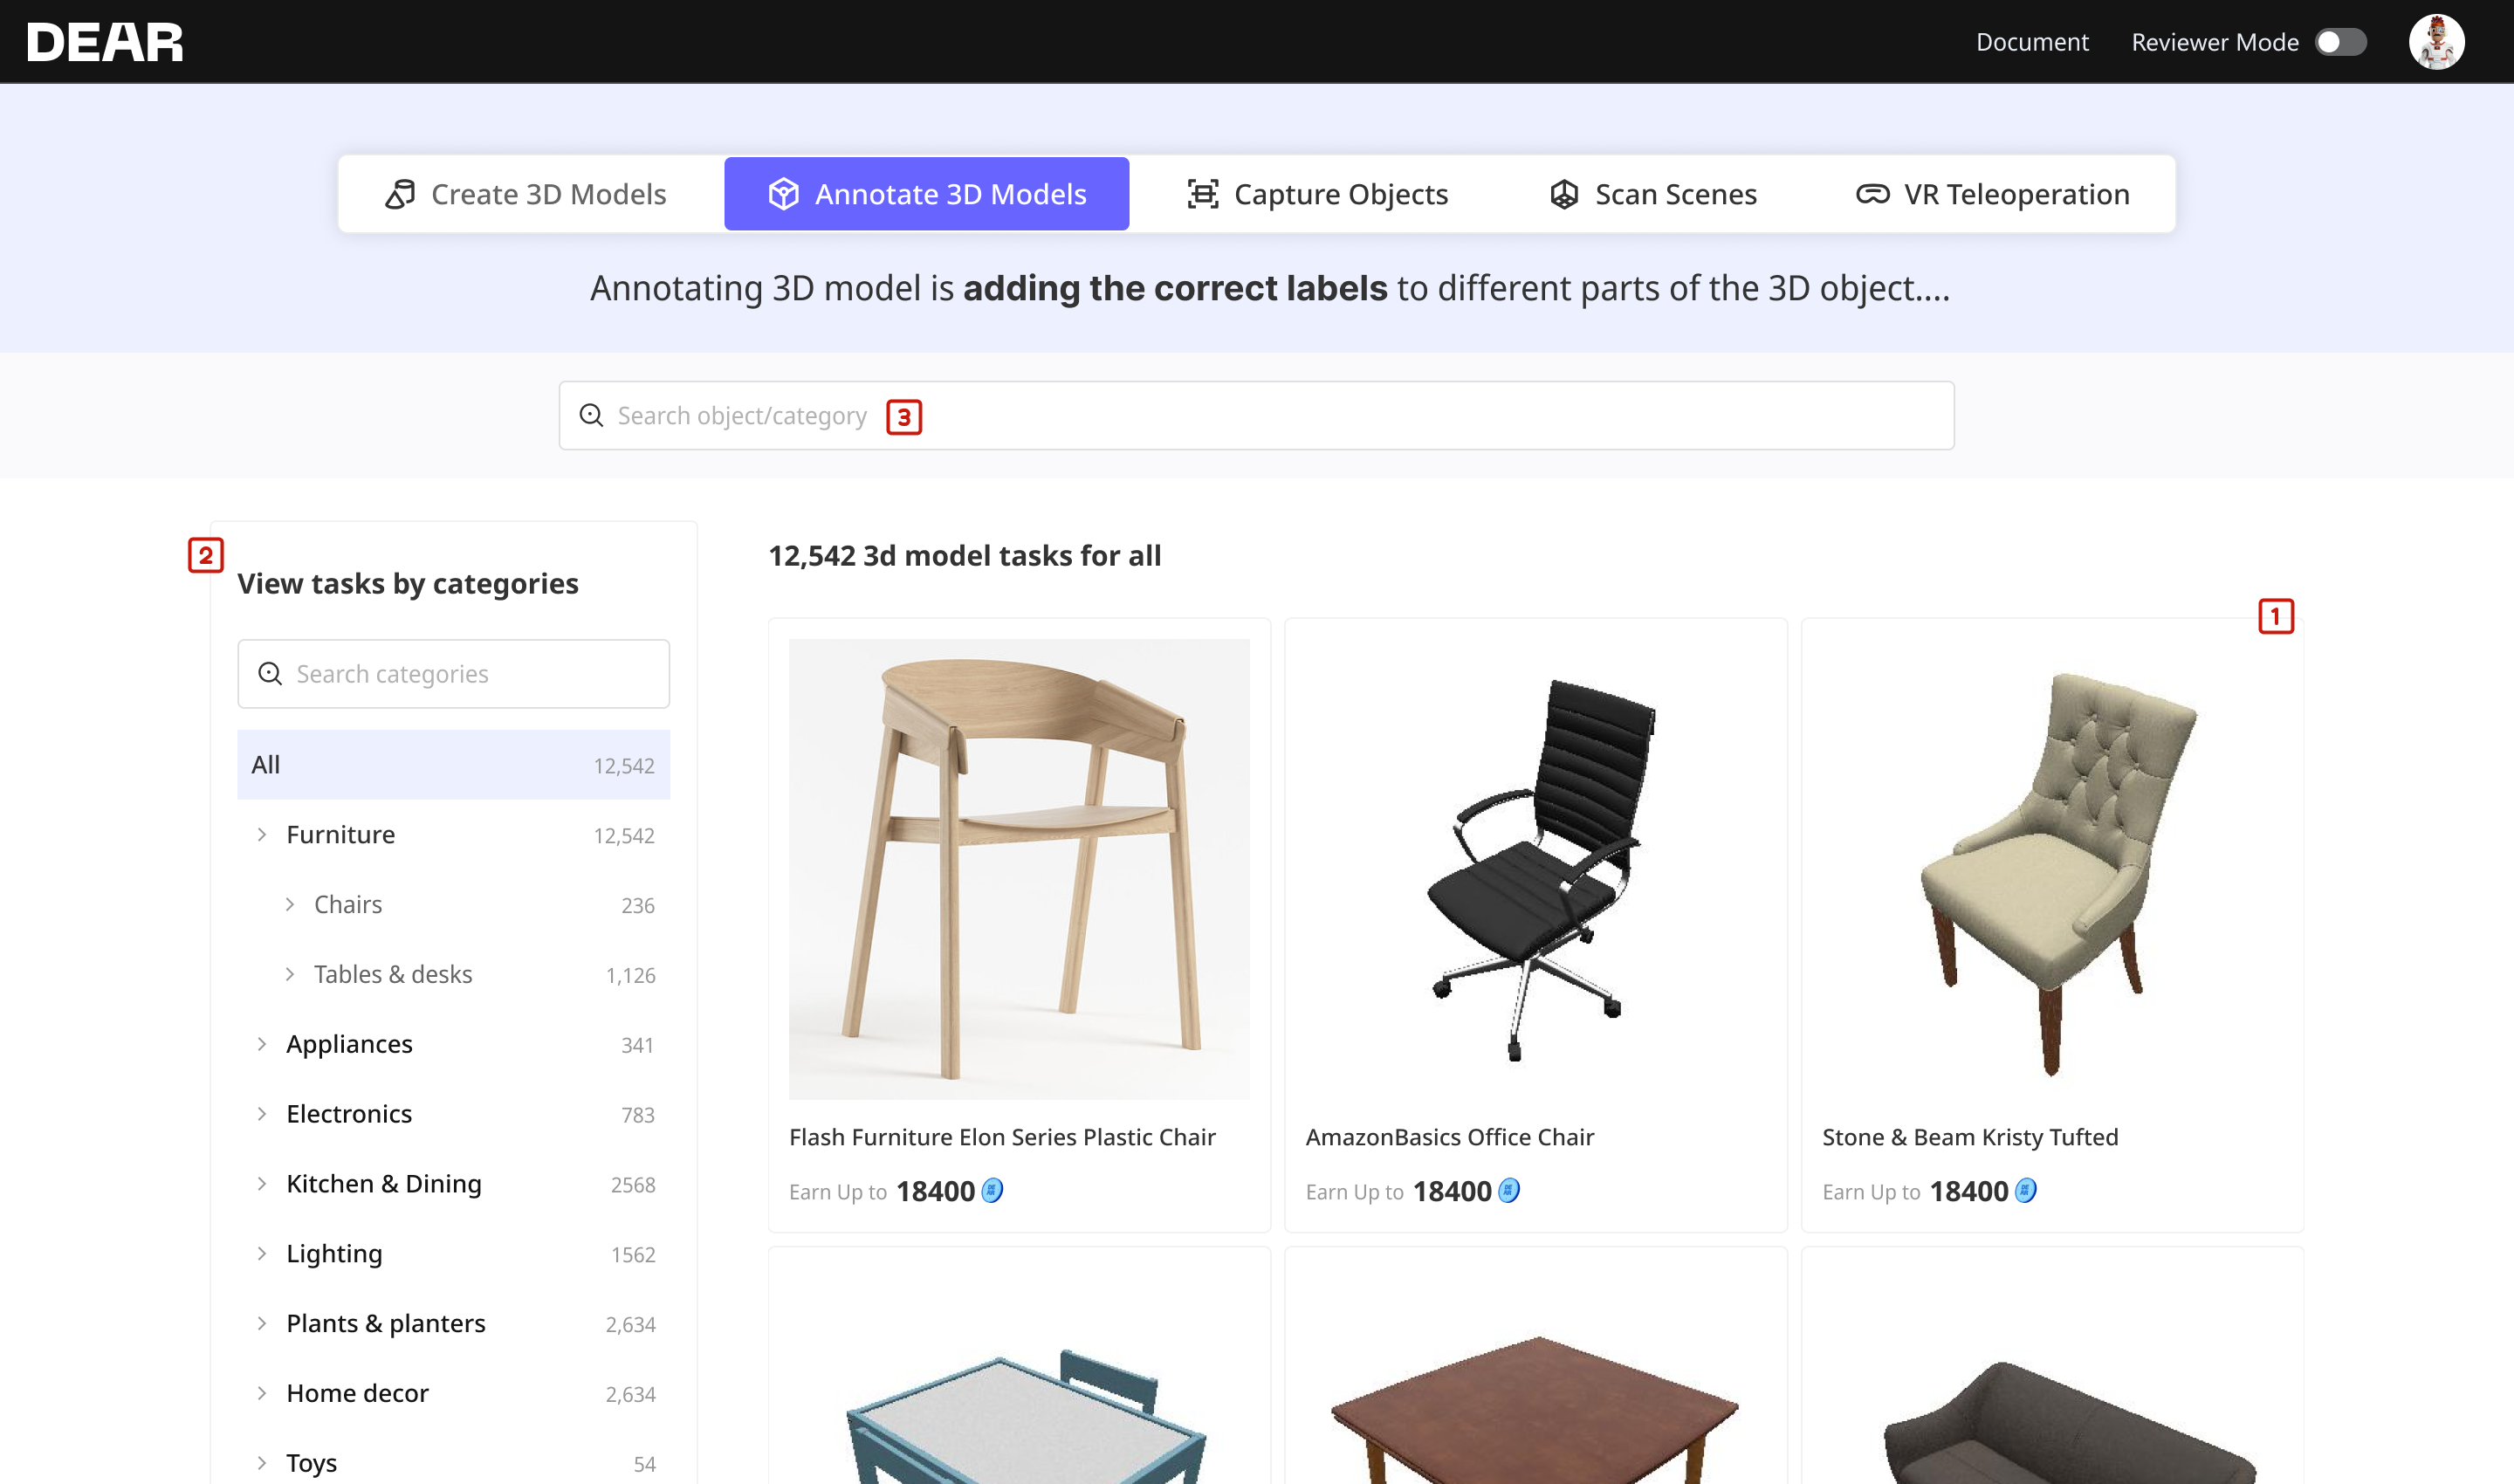
🌐Browse Task
The annotation tasks are designed to all users. You can handle the task after you learning this tutorial document.
There are a few ways to browse/find tasks:
- 👀browse the tasks by keeping scrolling down the page.
- 📂filter by category. Choose the category you are good at modeling by the category list in the left side.
- 🔎search by category/model.
📕Understand Task
In the task detail page, please pay attention to some information.
- Model Preview
- Task credits: This is the highest credits annotator can earn on this task.
- Structure Reference for Labeling: Here list some parts for each category's objects/models. Annotator can annotate the model including but not limited to these parts.

Navigating the Interface
After taking an annotation task and enter the annotation screen, the window should look similar to the image below. Annotation tool's interface is separated into 4 main parts:
- Annotation workspace: The area where parts of a model can be viewed, selected, and labeled for annotation.
- Annotation parts list: Display all the parts that have been annotated and the unannotated part.
- Annotation progress: Visually displays the completion status of the annotation process.
- Submit annotation: Submit the annotation results once all parts have been labeled.
Learn the controls
Before labeling, you need to learn how to control and view the model.
Start Annotation
Let’s take a tour of labeling a part.
How to use the pre-defined part information of the model?
If the model is well structured when creating, you can also refer to the pre-defined part information. Choose the "Mesh(icon)" in the selection mode list, the pre-defined part information will display. Check a part, the faces will be highlighted in the model. You can add or remove highlighted faces to correct the selection and then complete the following annotation steps.
This information will help you to select faces faster and label a part name easily.
References & Assist Tools
There are some advanced features to help you to annotate.

"Structure Example”: Here lists suggested parts and names for annotation reference. Not all the annotation task / model contains this info.
![]()
"Advanced Settings”: Here list 2 settings. · Backface culling: Use this setting to hide backsides of faces. · Simple Material: Apply simple colors to the model based on its modeling structure.
![]()
"Change background”: Use this to change background in case the model’s color is similar to the background.
Submit Annotation
Once the progress bar reaches 100%, which means all the faces are labeled to a part, you are able to submit the annotation.
Your submitted annotation will be reviewed by our reviewers. After reviewed, you can see the result in the "Account - Annotation" page.
- If approved, the credits you earn will send to your account.
Please note, reviewer will leverage the credits amount based on your annotation’s quality. You may earn credits less than the task credits.
- If rejected for some reason, you will not earn credits, but you can redo the task if it is still open.